The Secrets of Pro Hardwood Flooring Installation

Have you ever walked across a wooden floor that’s so beautifully done, that you can’t find a flaw no matter how hard you try? We’re talking about no discomforting unevenness, no unseemly gaps, no horror-movie noises – just a smooth, comforting experience through and through.
If you know what we’re talking about, then you’ve most probably encountered the work of reputable Winston-Salem hardwood floor installation services – and that probably made you wonder “How do they do it?”
Today, we’ll showcase every step of the professional floor-laying process, helping you understand the extent of the work involved, as well as what you can expect if you’re considering treating your home to this phenomenal upgrade.
How do professionals install hardwood floors?
Hardwood floor installation is a comprehensive process, consisting of three phases:
- Pre-installation phase involves assessing and addressing the factors that could impact the installation process or the final result.
- Installation phase is where the magic happens and is typically the most time-consuming part of the process.
- Post-installation phase entails adding finishing touches for that signature “wow” effect, as well as performing a detailed final inspection to ensure everything is up to standards.
While this is it in a nutshell, it is also a gross oversimplification of the actual process – which is why we won’t leave it at that.
Pre-installation phase breakdown
During this phase, your pros will perform a variety of activities to prepare the groundwork for installation – quite literally, in some aspects. Typically, they’ll start off with a thorough site inspection, verifying that the subfloor is level, dry, and stable, as well as checking for any water damage, rot, or structural issues that could impede the installation process or compromise the end result.
Next, they’ll move on to subfloor preparation, which can go three ways:
- If there are only minor to medium cracks or gaps, they’ll fill them with a self-leveling compound.
- If the subfloor is in poor condition, they will have to install a new one to ensure the integrity of the new flooring.
- If (or when) the subfloor is in good condition, pros will ensure it is clean, dry, and free of residues (e.g. old adhesives, paint, etc.).
Now it’s time to plan the layout. The installers will measure the room(s) to determine the best positioning and orientation of the flooring boards, taking into consideration factors such as room traffic and your aesthetic preferences.
The third step is acclimating the hardwood to the interior conditions. This entails storing the boards in the installation area(s) for 1-3 days, all the while keeping an eye on the flooring’s moisture content to make sure it remains within the manufacturer’s recommended range. After that, the work can begin.
Installation phase breakdown
The workflow of this phase will largely depend on the selected installation method and type of flooring, with the three options being:
- Nail-down or staple-down are most commonly used for solid hardwood. This method entails installing plywood or OSB underlayment over the subfloor to create an even, smooth surface, and then using a nailer or stapler to secure the planks in place.
- Glue-down installation, the prime choice for engineered hardwood, involves applying specialized adhesive to the subfloor, and then pressing the boards into it to create a firm, lasting connection.
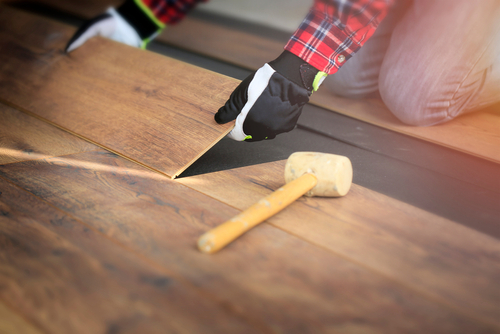
- Floating installation is typically used for laminate, but it is viable for engineered hardwood as well. Here, a specialized underlayment material (e.g. foam or cement-based) is placed over the subfloor, serving as a stable base for interlocking components.
It should be noted that the duration of the installation phase primarily depends on the size of the room, typically ranging from 1-3 days for smaller spaces (e.g. 100-500 sq.ft.) to 2-5 days for larger ones (e.g. 500-1,500 sq.ft.). Also note that these are ballpark estimates and that the work can take a bit longer depending on the challenges encountered during the installation.
Post-installation phase breakdown
With the principal work finished, it’s time for the final touches to give the flooring a uniform look. Typically, this entails:
- Installing transition strips to cover the gaps between separate but adjacent sections of the flooring;
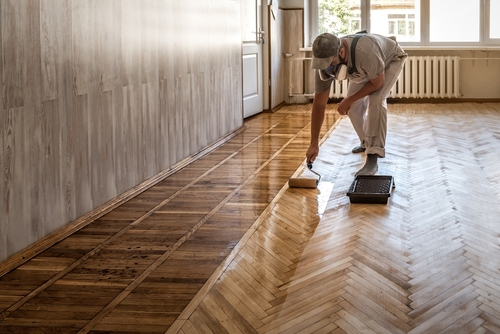
- Applying a finish, such as stain or polyurethane, provided that the flooring doesn’t come prefinished.
Finally, your pros will conduct a final inspection, verifying that the installation meets the industry standards, the manufacturer’s guidelines, and your expectations, giving you complete confidence that you’ll enjoy your hardwood flooring for years to come.
 Which hardwood floor installation services near me in Winston-Salem are considered top-notch?
With a track record of excellence spanning more than two decades and hundreds of satisfied customers in Winston-Salem alone, Premier Hardwood Flooring is the de facto top choice to entrust with upgrading your home.
Whether you’re near Innovation Quarter or elsewhere in the region, whether you want only one room or an entire house done, rest assured that we’ll deliver on the promise of quality, to your ultimate satisfaction. Get in touch with us today and let’s make your space – better!


 Which
Which 